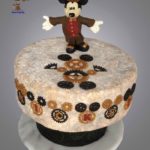
Looking for ideas for a Father’s Day Cake? This cake, which was obviously for a birthday, would work great.
Once you’ve baked your cake and iced it, you need to make the chocolate cake top, mold the chocolates tools and toolbox, and add the writing.
Make the Chocolate Cake Top
Here’s the secret to the making the Chocolate Cake Top – mold the chocolate in the same cake pan that you used to bake the cake. That way it fits perfectly.
For both the chocolate cake top and the chocolate tools, I used Ghirardelli’s Dark Chocolate Candy Making & Dipping Wafers. The wafers are easy to melt, they don’t have to be tempered and the Ghirardelli chocolate tastes wonderful.
The chocolate cake top should be about one-quarter inch thick. If it is too thin, it will break. Estimate how many chocolate wafers it will take to fill one-quarter inch of your cake pan. Put the wafers into a microwave safe bowl. Warm it for 45 seconds. Take it out of the microwave and stir the chocolate as much as possible. Heat the chocolate for an additional 15 seconds and again stir as much as possible. Do not overheat it in the microwave or the chocolate will change consistency and will not be good. To prevent this, when most of the chocolate is melted, keep stirring the melted chocolate onto the unmelted wafers and they’ll melt.
Pour the melted chocolate into the cake pan. Make sure to tap the cake pan on the table several times to knock out any air bubbles in the melted chocolate. Keep tapping on the table until you do not see any more bubbles coming to the top.
Another tip – use cloth gloves or paper towels to handle the chocolate so that you do not get fingerprints on the chocolate.
Once you get the air bubble out, place the pan in the refrigerator for about 45 minutes until the chocolate has hardened. To remove the chocolate circle, place a cardboard cake circle into the pan up against the chocolate and support it with your hand. Carefully turn the pan over. Tap lightly on the pan with your other hand until the chocolate releases.
Place the thin chocolate top on the frosted cake and then add additional frosting to the sides as necessary to make the chocolate top even with the sides of the cake.
Mold the Chocolates Tools and Toolbox
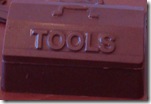
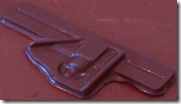
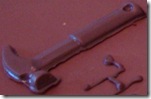
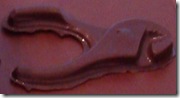
I molded the chocolates tools and a chocolate tool box using a chocolate tools and toolbox mold.
The steps to molding the chocolate tools and toolbox are very similar to the steps for making the cake top.
Estimate the amount of chocolate needed to fill the mold.
Melt the chocolate taking care not to overheat the chocolate.
Pour the melted chocolate into the mold and pound the mold on the table until all of the air bubbles are gone.
Let it sit in the refrigerator for twenty minutes. The cake topper needed to be refrigerated longer because it was a much larger piece of chocolate.
To remove the chocolates, turn the mold over and bang gently it on the table until all the chocolates fall out.
I just placed the chocolate tools on the cake. If you need to transport the cake, put the tools on after you’ve transported the cake.
Add the Writing
Melted a few of the Ghirardelli chocolate wafers and place the melted chocolate into a sandwich bag. Cut a very small slit in one of the bottom corners of the bag so that chocolate can come out. Squeezed on the bag as needed to create a stream of chocolate to do the writing. I highly recommend practicing on parchment paper before writing on the cake.
With these steps, you can take an ordinary chocolate cake and turn it into a beautiful Father’s Day cake.