Tips & Tricks

How to Wash Good Kitchen Knives

Cleaning your knife correctly, protects your investment.  I use my paring knife and my chef’s knife almost every day.  I’d estimate that I’ve used my paring knife at least 7,000 times and my chef’s knife around 4,000 times.  Because I clean them properly and hone them before almost every use, they still cut as well as they did when I purchased them almost 20 years ago. 

 Here are a few simple tips I’ve learned from caring for my knives:

I always wash my good kitchen knives by hand.  I never put them into the dishwasher.  Banging around against other items in the dishwasher can dull the knife and could tear up the dish washer rack over time.

Always keep the knife out of the water until you’re ready to wash it.  If getting cut by a knife is no fun; getting cut by a dirty knife in dirty dishwater is a thousand times worse and you can get a nasty cut feeling around in the sink for a knife.  Wash the knife by hand very carefully with soap and water and a sponge. Keep the knife blade pointed away from you.

If you need to soak it for a few minutes because there is something stuck on the blade, fill a pot with water and put the knife in the pot.  Make sure the knife handle is clearly visible. 

Let the knife air dry or carefully dry it with a towel with the blade facing away from the towel and you.

Never put a wet or dirty knife back into a knife block.  The knife may start to rust and if food or dirt gets into the knife block, it can be very difficult to remove.

If you follow these simple steps, a good kitchen knife should last for decades.

How to Mold Chocolates


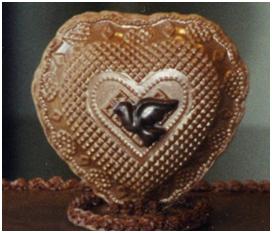
You can use molded chocolates to make cake toppers, graduation presents or even chocolate roses for Mother’s Day.


Because the finished product is so pretty, people think that molding chocolates is extremely difficult, but it doesn’t have to be.  I’ve done multipart chocolate molds which snap together; those are difficult.  But basic chocolate molds aren’t.  All you do is:


  • Select your mold
  • Measure your chocolate
  • Melt your chocolate
  • Pour your chocolate into the mold
  • Tap out air bubbles
  • Wait for the chocolate to harden
  • Remove from mold


Select the mold that you want to use. 


Estimate the amount of chocolate needed to fill the mold. I always try to over estimate; it’s better to have a little too much chocolate than too little chocolate.  I like to use Ghirardelli Chocolate Dark Chocolate Candy Making & Dipping Wafers.  Ghirardelli’s candy making chocolate used to be large chocolate bars, they were difficult to break and measure accurately.  The new wafers are much easier to use.


I melt the chocolate in a small microwave safe bowl. If you overheat chocolate in the microwave, the chocolate will change consistency and will not be good. So you need to warm it just a little.  After you’ve microwaved the chocolate, remove the bowl from the microwave and stir any melted or soft chocolate. Then heat it just a little again.  Here’s what I do.  I warm the chocolate for 45 seconds and then I stir any soft or melted chocolate.  After that I switch to heating the chocolate for 15 seconds and then stirring the chocolate. Repeat this cycle until most of the chocolate is melted.  By stirring, you should be able to melt the last little bit of chocolate without heating it again. If the chocolate looks dull after it dries, it has been overheated.


Pour the chocolate into a chocolate mold. Make sure to tap the mold on the table several times to knock out any air bubbles in the chocolate. Keep tapping on the table until you do not see any more bubbles coming to the top.


Make sure the mold stays level while the chocolate is hardening. For molds that are unlevel, I sometimes place balled up paper towels under a part of the mold to keep it level. Let it sit in the refrigerator for twenty to forty minutes. Do not let white chocolate sit for much longer or it will tend to break.


To remove the chocolate from the mold, turn the mold over and bang it gently on the table until all of the chocolates fall out. If the chocolates refuse to fall out, they may need to harden in the refrigerator longer. If so, return the mold to the refrigerator and try again in twenty minutes. Use cloth gloves or paper towels to handle the chocolate so that you do not get fingerprints on the chocolate.

Use Food Processor to Aerate and Mix Dry Ingredients

Place all dry ingredients for a baked recipe such as a cake into the food processor. Pulse the ingredients for several times for about 6 seconds each. This will aerate the flour and mix the dry ingredients together. It will also make the sugar finer and cause the cake to have a finer crumb.

My daughter hates to use a sifter. We always use a food processor instead of a sifter to aerate and mix the dry ingredients for a cake recipe. We originally got this idea from Alton Brown who also hates to sift.

Note: A food processor does not work for powdered sugar for icing.  You must still use a sifter for the powdered sugar used in icing so that it will not contain any lumps, especially if you are using decorating tips to decorate the cake.


Use Measuring Spoons


Use actual measuring spoons to measure ingredients in a recipe, especially any baking recipe.  Teaspoons and tablespoons that are part of a regular dinner place setting may not be an exact teaspoon or tablespoon and will cause you to have the wrong amount.  If you are measuring something like baking powder or baking soda,  this can make a big difference on how the recipe turns out.