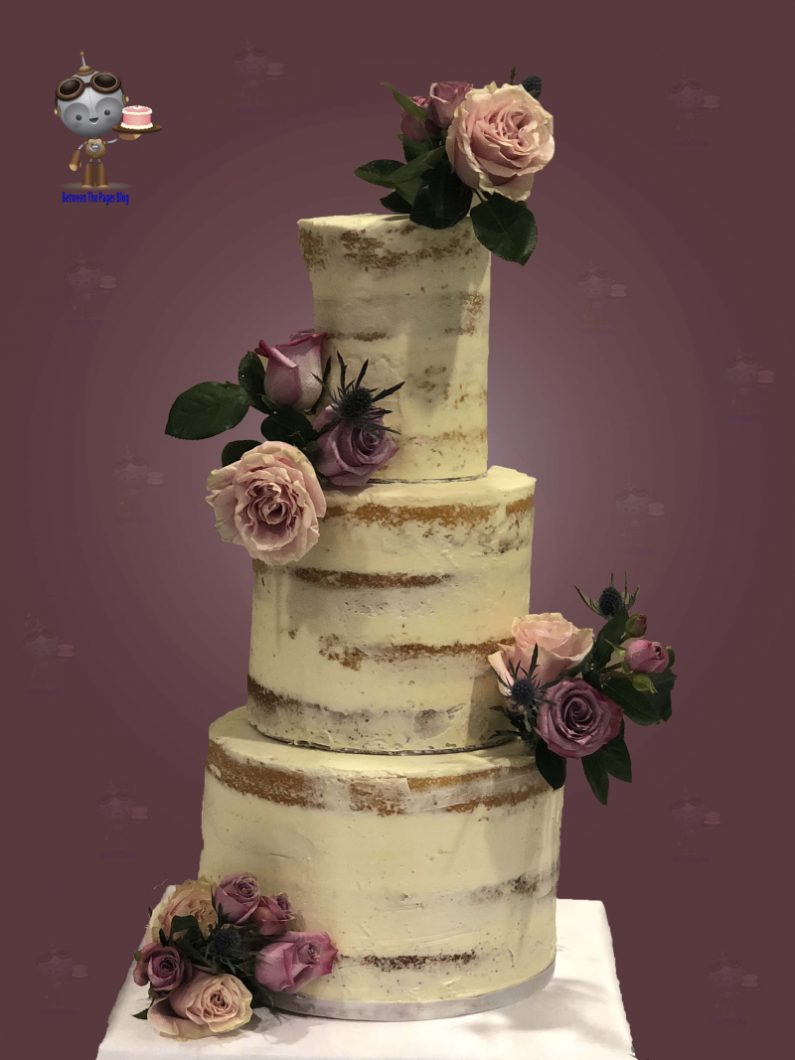
This How To Make a Barrel Semi-Naked Wedding Cake With Fresh Flower Corsages is a tutorial of how I made this semi-naked wedding cake with fresh flowers for my sister-in-law and her husband to be. This tutorial contains my Amazon affiliate links to show the products that I used. If you like this tutorial please use the links to purchase the supplies.
She wanted a cake with no fondant and without a lot of icing so the semi-naked wedding cake seemed the perfect choice. The cake needed to be able to feed at least 170 people. Also, even though is was a semi-naked cake it need to look elegant.
The process of making a wedding cake can be a daunting task so it is important to divide it into pieces:
The first step is to determine a design for the cake.
We looked at a lot of semi-naked wedding cakes out on the web, until we both found a design we really liked.
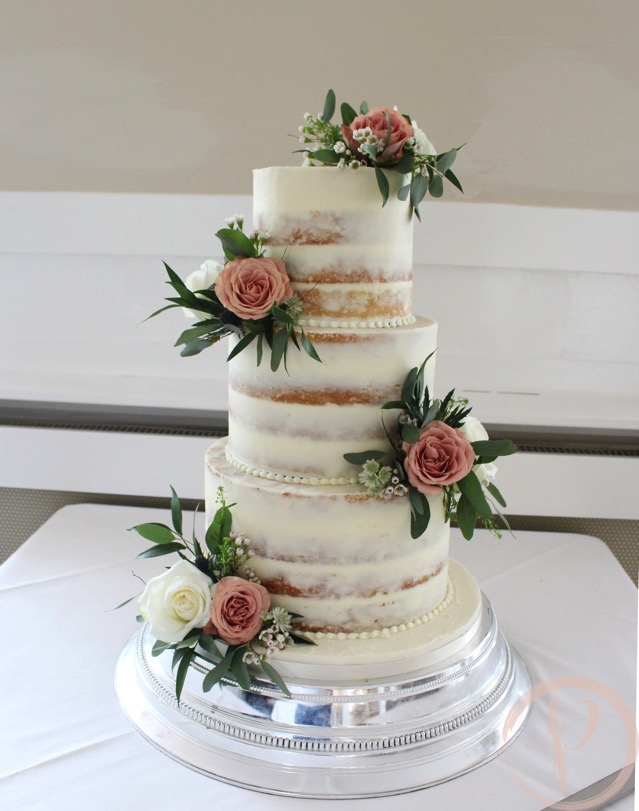
This is the cake from The Pink Cake Box in the UK that inspired my cake design. I just loved the elegant look of the flower corsages on the cake and I really like the way they were placed on alternating sides.
The cake needed to feed 170 people so I decided to go with a barrel cake design where each tier was made of 2 cakes consisting of 2 2 inch layers put on top of each other. There was a lot of left over cake so I did not need to do a double barrel.
Next determine the size of the cake and the recipes.
The bride needed a cake to feed 170 people and she wanted a cake with a slight almond flavor and a strawberry filling. I chose to use a Strawberry Buttercream and a thin layer of Strawberry conserve on top of the strawberry buttercream. The recipe for the Strawberry conserve came from the Cake Bible. I recommend an Italian Buttercream recipe. Although for this cake I used Mike McCarey’s buttercream recipe. I mixed some of the buttercream with the strawberry conserve to make the strawberry buttercream. This recipe combination will require the cake to be refrigerated.
After that make a schedule to determine when each part needs to be completed. Since this is a semi-naked cake, the cake will need to be baked and iced 2 days before the wedding or baked a few days before and each layer wrapped well and put in the freezer. If frozen, it should be baked and iced by the day before the wedding. Also you should ideally leave the layers for a few hours to a day to set after baking before building the tiers.

2. how to make the semi-naked cake
To make the cake layers, I found The Cake Bible by Rose Beranbaum to be a terrific resource. Near the back of the book, she goes over how to make a wedding cake. She strongly recommends to not go above a 12 inch layer as the bottom layer. Her standard cake is a 3 tier or 6 inch, 9 inch, and 12 inch. I needed enough to feed 200 people so I went with a barrel cake that would double this.
First I used her All American Downy Butter Cake with almond flavoring at 3/4 of the amount she said for vanilla with the last 1/4 being vanilla. For 2 of the 12 inch layers, I used her full recipe and my Kitchenaid mixer barely held it. For the last 2 12 inch layers, I halfed the recipe for 2 12 inch layers and mixed and baked each separately and it seemed to work better. Her recipe for the 6 inch and 9 inch layers as a single batch worked well.
Also with her recipes, I did not need to add a core in the middle of the pan for the middle to cook. She adjusts the baking powder amount to allow for the larger pan size. If for any reason, the layers are slightly taller in the center, I take a paper towel and gently mash them down to be level when they first come out of the oven.
Next, I made homemade cake baking strips (my own version of Magistrips) by taking a piece of heavy duty foil a little larger than the circumference of the cake layer and putting folded over moistened paper towels in the middle. The paper towels should be fairly moist, but not dripping wet. Next I folded the paper towels and the foil to be about 2 inches high since that was the height of my pans. These worked pretty well. I also use Wilton Magistrips when they are the right size. I find they work slightly better than my homemade
I drew the outline of the pan onto parchment paper using a graphite pencil, the cut the circle 1/8 inch just inside the graphite line to have a piece of parchment to match the size of the bottom of the pan.
I put crisco in the bottom, then put the parchment round on top of the thin layer of crisco. Then dusted with flour and shook out excess. Next I baked the each cake layer.
3. Building each tier
Since double barrel tiers are so tall. each half of the tier must be built separately, then put together. For each part of the double barrel tier. Place the bottom cake layer on a cake circle or a wooden 12 inch circle for the bottom tier. To keep the cake circle from showing, the pieces going inside the double barrel may need to be trimmed slightly. Next to fill the cake, put a circle of buttercream icing around the outside edge of the cake layer to form a barrier so that the filling will not run out of the cake. Then put the strawberry buttercream inside it. Finally put on a very thin layer of the strawberry conserve. This should not be any taller the the outer circle of buttercream icing. Next put on the second layer of cake. Finally I put a thin layer of buttercream icing on the top and sides of the tier. I put on more than I needed and gently scraped off the excess with a plastic bench scraper to make it semi-naked. After that, build the second tier of the same size. The bottom tier was built on a 12 inch half inch plywood wooden circle, The other tiers bottoms were built on 2 cake circles glued together.
4. Build each double barrel tier – prepare each cake tier piece for stacking
The double barrel is composed of two tiers of the same size stacked together to form one tall 7 inch tier. Put straws into the bottom part of each tier so that the other tier of the same size can be stacked on top. All of the straws should be the same height as each other and the same height as that part of the tier. Since they are straws, they can be cut with scissors. Next put the top piece of the tier on the bottom piece and make sure it is lined up all the way around the cake. At this point, add additional buttercream to hide where the two pieces join and scrape off any excess.
Next for the top part of each tier that will have the next smaller tier on top, mark the next tier size and place straw into the bottom tier inside the diameter of the next smaller tier. All of the straws should be the same height as each other and the same height as the tier. All of straws will be abut 3 1/2 to 4 inches tall since they only need to be as tall as 2 cake layers.
Finally once each double barrel tier is build it should stay refrigerated. They will have to be completed the day before the event.
5. make the cake stand – this should be done at least a week before the cake is due
My husband’s dad helped me make a wooden 4 inch tall square that was 16 inch by 16 inches. The top was 3/4 inch plywood and the sides were 2 by 4 pieces. I covered it in a layer of batting. Then covered it in a layer of satin for the cake to sit on. It was strong enough to stand on and certainly strong enough to hold any cake.
6. prepare fresh flower corsages for the cake
The first thing to consider with fresh flowers is how to make sure they are safe for a cake. I asked the bride to get me a list of flowers ahead of time and looked up each one to make sure it was not harmful to humans.
Also I needed a way to insert the flowers into the cake without the stems being in contact with the cake. In order to do this I chose Wilton cake flower spikes.

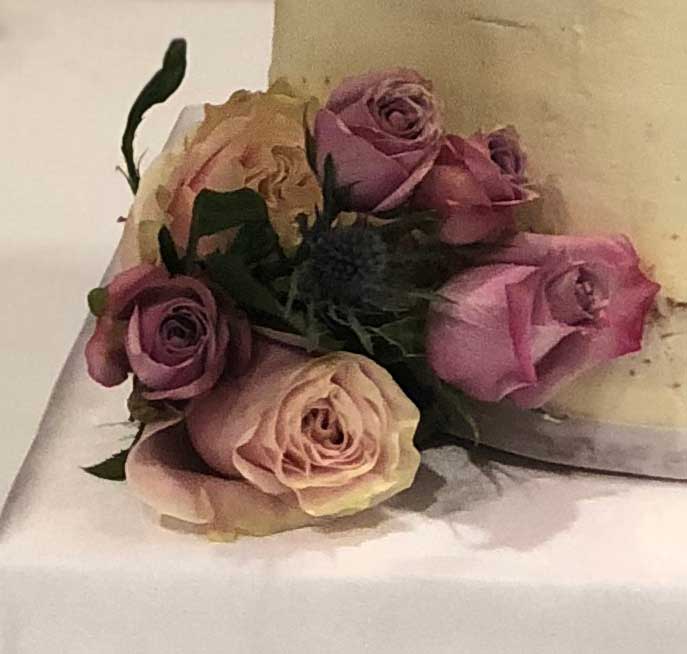
For the bouquet, each flower had to be wired separately and the leaf clusters were wired as well. First I inserted a wire through the base of the rose. Next I cut gauge 26 wire at an angle to make it easier to pierce through the flower. Then I wrapped each stem with floral tape.
If you just try and use the flowers from the florist as they are, the stems will be too long to fit into the wilton holders and they will not bend the way you want them to go. On wire, the wire will bend so you can position the flowers for a better presentation.
Tools:
wire cutters
flower cutters
water spray bottle
airtight container for flowers
PME clear glaze
Supplies:
floral tape – I preferred light green
wire of various sizes – mostly 26 gauge
I found this video by Flowerschool.com on how to make flower corsages to very helpful. I was new to flower corsages so it took me about 3 and 1/2 hours to make these corsages. First I had to wire and wrap about 20 flowers and about 10 leaf clusters so it took me a while. Also I did this the night before the wedding since it was a morning wedding.

Once I completed each bouquet I sprayed it with a mist of water all over and put it into a air tight container and placed it in the refrigerator. You can place multiple bouquets in the same container, just make sure not to crush the flowers.
(Note:you must use an airtight container or the food gases in the refrigerator may wilt the flowers.)
Assembling the Cake at the venue.
Look at the venue and figure out exactly where the cake will be placed. Next make room for all three tiers inside the venue. First place the cake stand on the cake table. After that place the bottom tier onto the cake stand. Next place each tier on top of the previous and make sure it is centered. I used large Wilton cake lifters to move each tier into place. In order to fully secure it, I drove a wooden dowel through all 3 tiers and slightly into the bottom wooden cake board. Next I cut the dowel to the height of the cake and put a bit of buttercream to hide it.
Next I took a piping bag with buttercream icing and piped around the gaps where each tier joins. The buttercream should be remixed the day of the event so that it will not be a different color from the rest of the buttercream on the cake. I smoothed it with a gloved finger and small spatula.
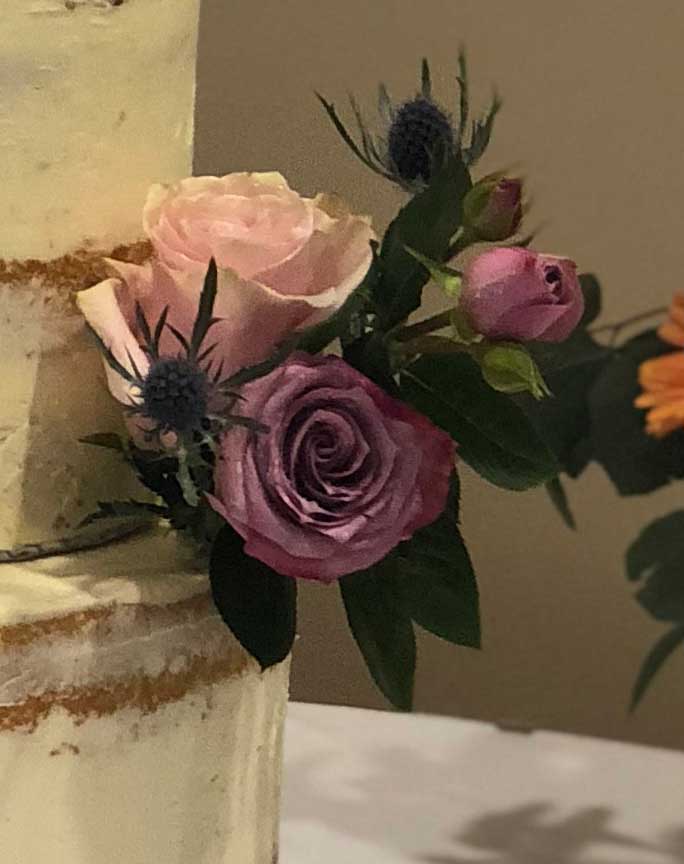
Next once I got to the venue, before putting the flowers on the cake, I needed a barrier between the cake and flowers to protect against pesticides on the flowers. After that I took the bouquets outside and sprayed the back of them with PME edible spray glaze and let it dry for about 5 minutes. Then I put the flowers into the Wilton cake flower spikes. The flower spikes go straight down into the cake so it is nice to have to wire to be able to bend the flowers the face the direction that you need. I put the flower spikes into each tier the night before so I could get an idea of what each flower corsage needed to look like. Also they were there when I added the flowers on the day of the wedding.

(NOTE: spray PME edible spray glaze at the venue just before putting onto cake – if you spray it the night before, you will see a white powder on the flowers left by the spray.)
Once the flowers were added the cake was complete.
You may also enjoy Pop Culture Wedding Cake Ideas and more Between the Pages creations.
I also made this Elegant wedding cake with rose flower corsages and the Millennium Falcon.