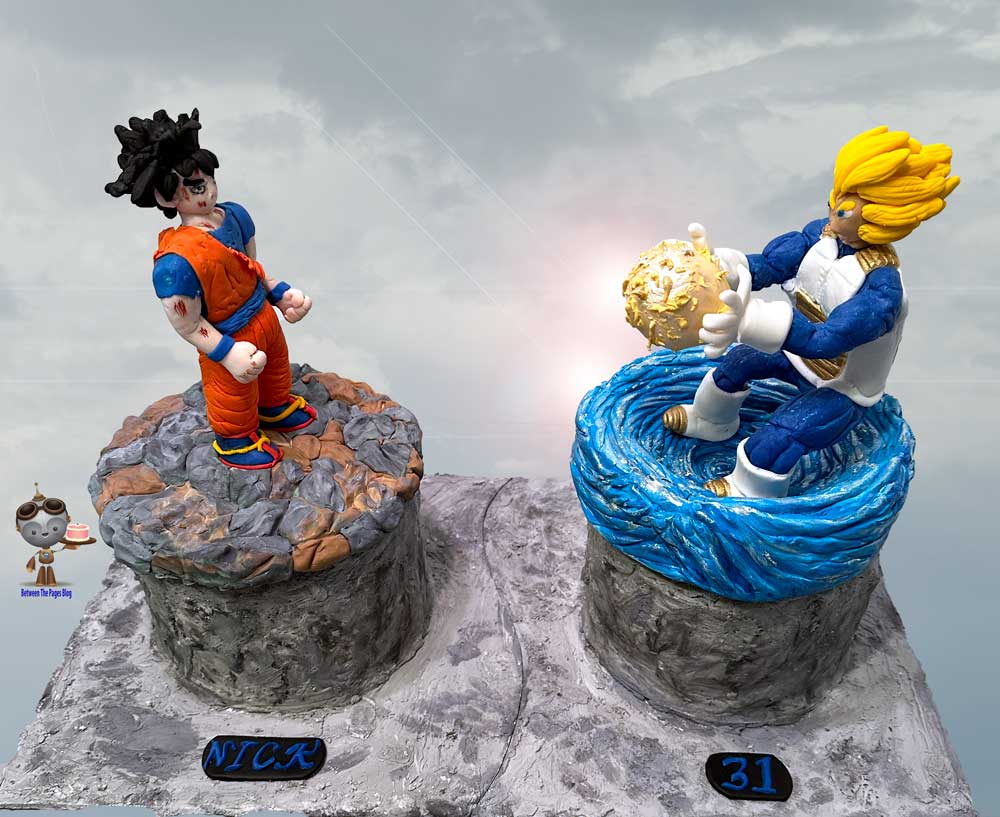
This Vegeta Defeats Goku Cake tutorial features fondant figures of Vegeta and Goku. Each is a cake topper of a 6 inch cake that is a plateau in the landscape.
I made this Dragon Ball Z cake for my niece’s husband’s birthday. My niece specifically requested a cake where Vegeta is winning against Goku. She wanted a cake like this because her husband loves Dragon Ball Z and he is a huge fan of Vegeta.
In order to show Vegeta defeating Goku, I chose an action scene. In this scene Vegeta is ready to release his Final Flash attack on Goku. Also Goku has many wounds and has plain black hair to show he has not transformed.
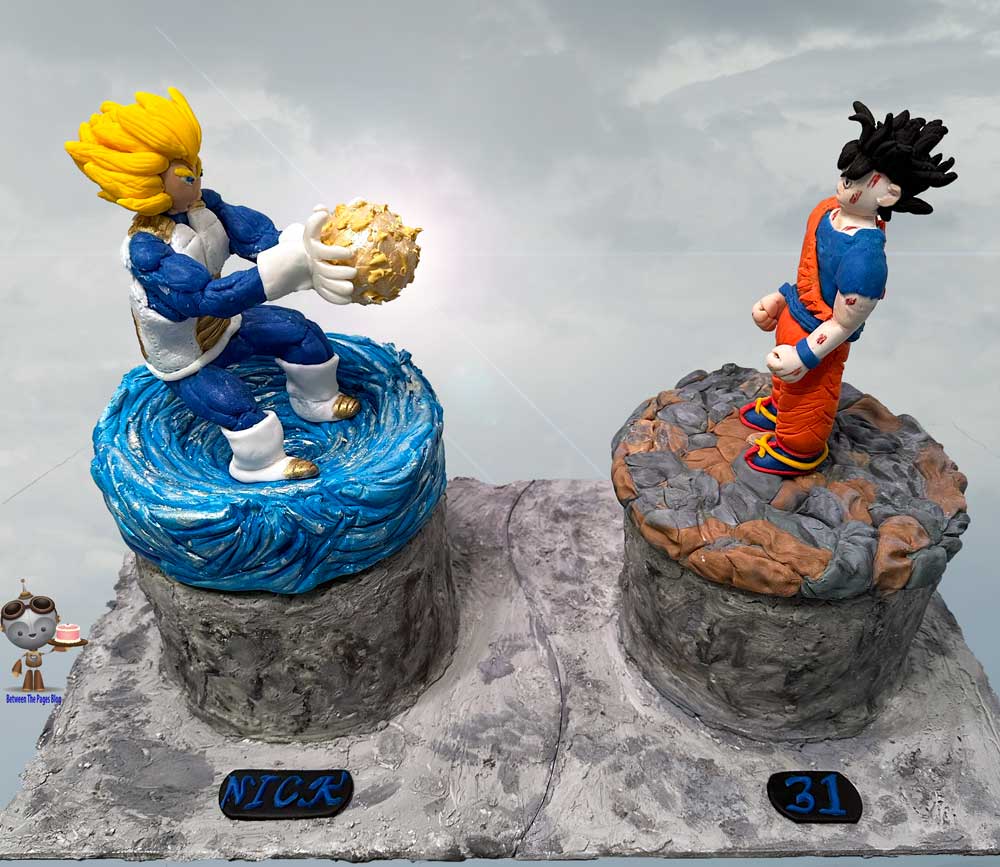
Fondant Vegeta Figure
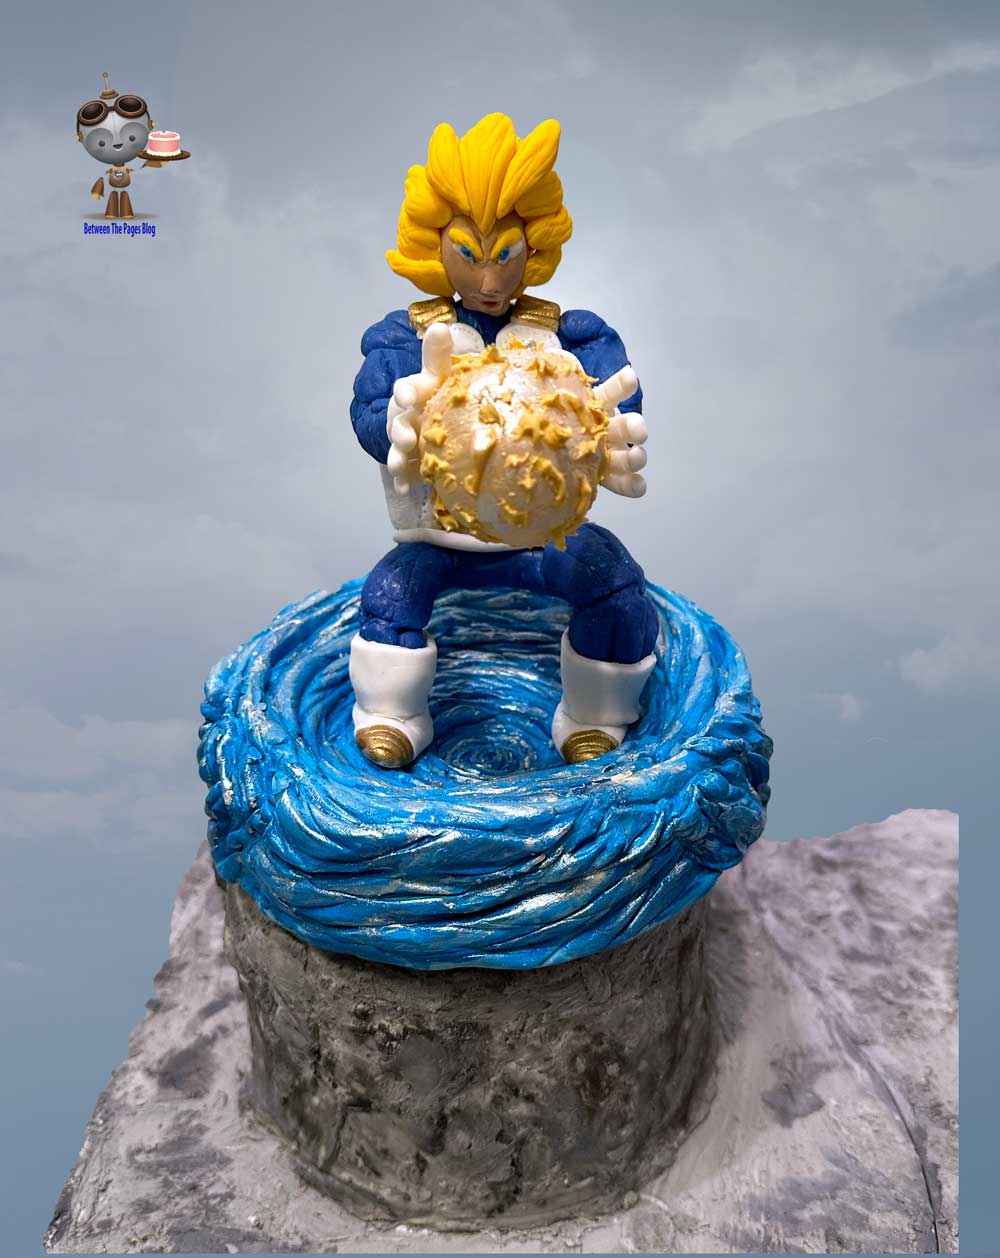
This fondant Vegeta cake topper was inspired by the limited edition Dragon Ball Z Vegeta Final Flash 1/4 Scale Limited Edition Figure. It was sculpted by artist Aslan Ay, with art direction from the Ryu Design Team at RYU Studio.
My fondant Vegeta is also using his Final Flash attack. He is standing inside blue energy and getting ready to release the ball of energy blast of his Final Flash attack.
The base is blue with silver highlights to represent energy. Also the energy ball he is releasing is colored light gold with textured to represent energy.
I explain how I made the figure later in this post.
Fondant Goku Figure
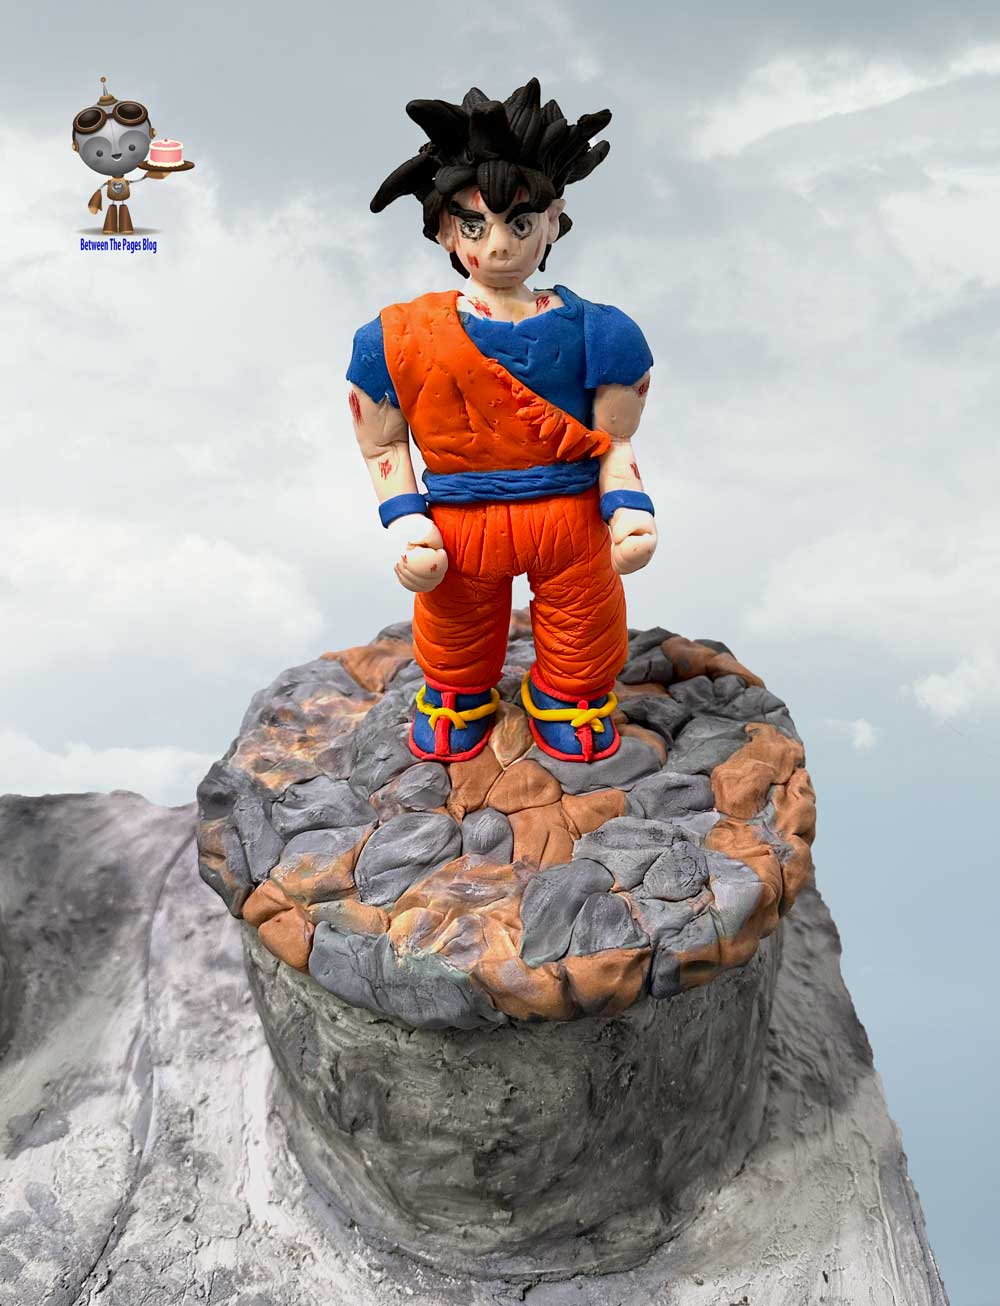
My fondant Goku figure is deliberately battle damaged to show he is losing the fight. He is also not transformed and has his regular black hair. In addition he is standing on a base of brown and gray rocks. These rocks are colored fondant. In addition gray highlights were added using edible paints. The paints were powder colors with golden grain alcohol added. Because the golden grain evaporates quickly it does not dissolve the fondant.
How I made the Fondant Goku
I used the Goku tutorial by Kaomi to create this figure . I changed my figure to added battle damage.
Change fondant and gumpaste weights to match figure of 2/3 size.
Also my figure was two-thirds the size of his so I changed all of his all of his suggested weights for fondant and gum paste accordingly. In addition I had only colored fondant so I added Tylose powder to make gumpaste.
Also the weights were very helpful to get the proportions correct. I used the amount of fondant suggested for the torso and shaped my own since the mould was for a larger figure.
Add details to figure using brush
I also discovered fine tip markers were not the best tool to make the black eye highlights. This was because the thin lines made by a fine point edible marker were too uneven on the fondant’s unlevel surface. Because of the uneven lines and having to go over some of them multiple time, the black eye highlights from the video were a bit too dar for my figure. Fortunately since my figure was injured they looked like he had a minor black eye. They but may have been a problem if I were exactly duplicating Kaomi’s figure.
Use cornstarch to let fondant figure pieces dry somewhat
In addition I used the idea of putting a sandwich bag of top of a container of cornstarch to give the pieces a place to dry without flattening out on a stiff surface like a table.
Shape legs a little longer that called for
Also my figure turned out a little dumpier that I expected. Next time I will make the legs a little longer that he said and taper the waist of the torso is little more.
More Views of the Cake
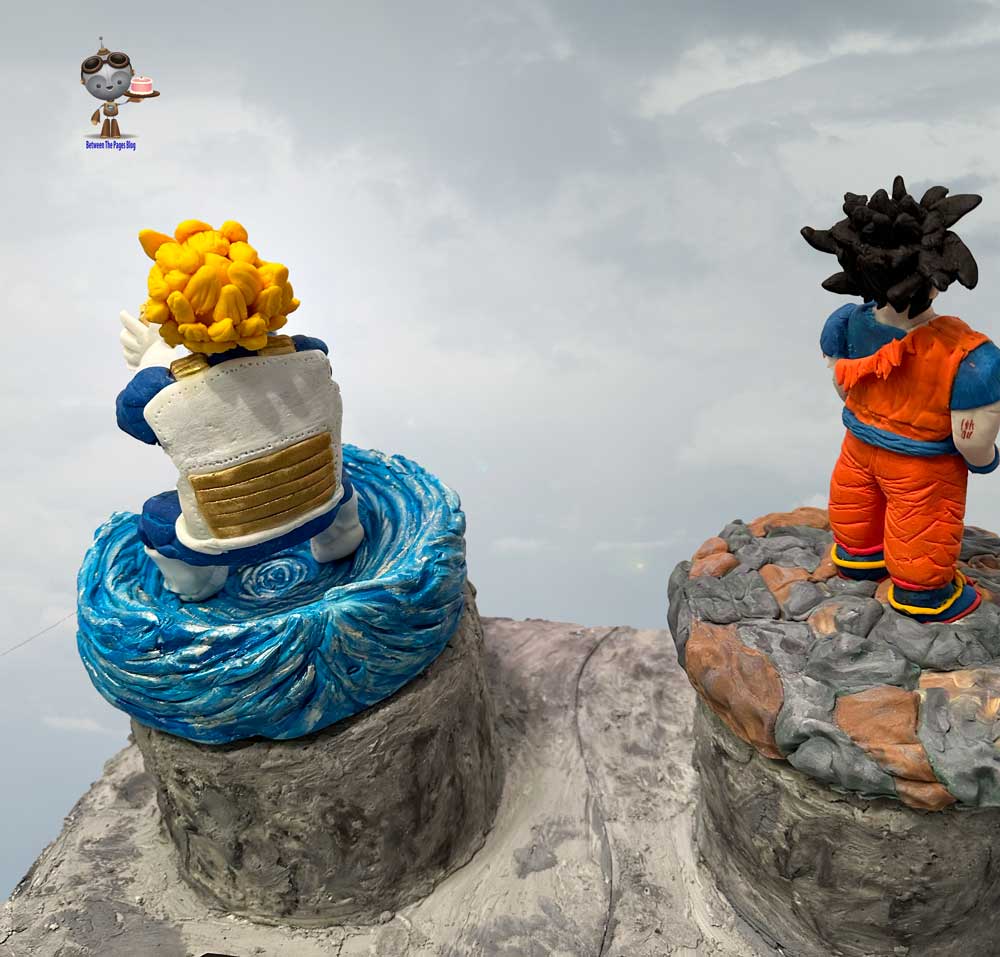
This is a picture of the backs of the fondant Vegeta and the fondant Goku. You can see the back of Vegeta’s hair and his gold and white shirt. In addition you can see Goku’s torn shirt in back.
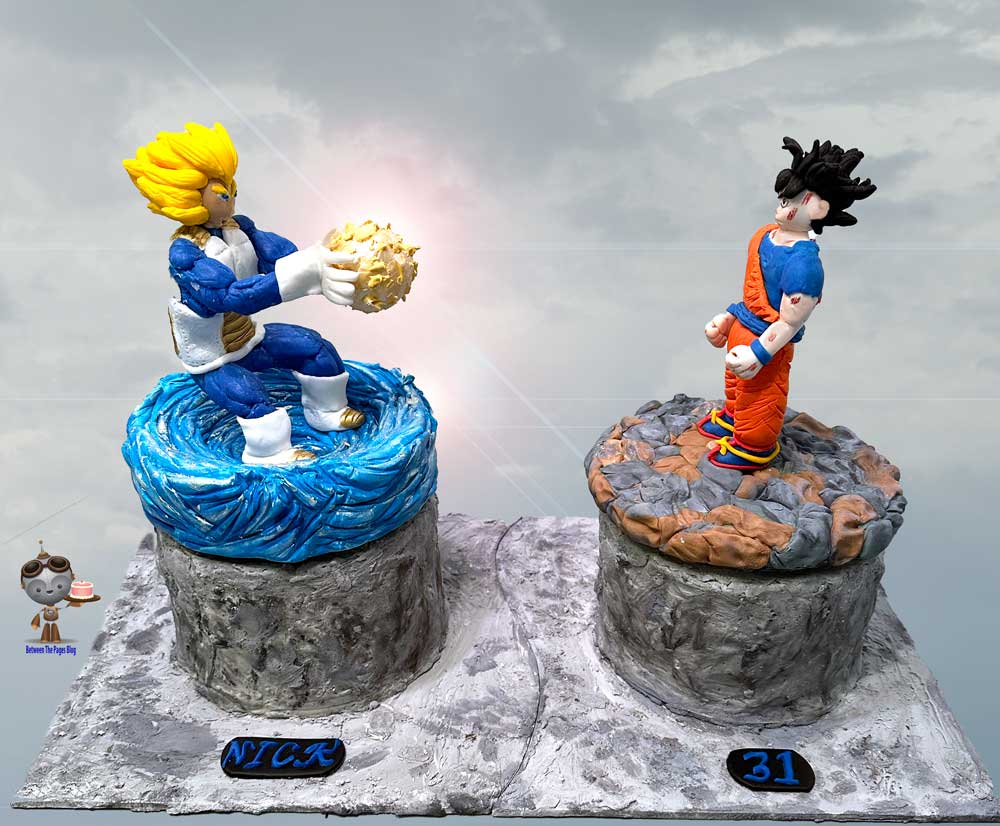
This is a view of the cake where Vegeta and Goku are flipped so that Vegeta is on the left and Goku is on the right.
Making the Cakes and Cake Boards
Bake cakes
I used Liz Marek’s Moist Vanilla Cake Recipe to make the cakes. Next I used white ganache flavored with vanilla and butter flavorings for the icing.
Make cake boards
For the cake board, I covered foam board with gray colored royal icing. Initially I tried to use black gel coloring to color the icing gray, but it just turned a shade of purple. Next I had to switch to coloring it with black powdered color instead.
In addition I covered the edges with a thin coat of royal icing and also painted part of the edges. If the royal icing was too thick on an edge it flakes off when touched. Next time I will try to make a thinner coat on the edges.
Also I cut out the cake board so that the two cake boards joined like a puzzle piece. I got this idea from this Yoda and Darth Vader Cake by Avalon Cakes.
How to Make Fondant Vegeta Cake Topper
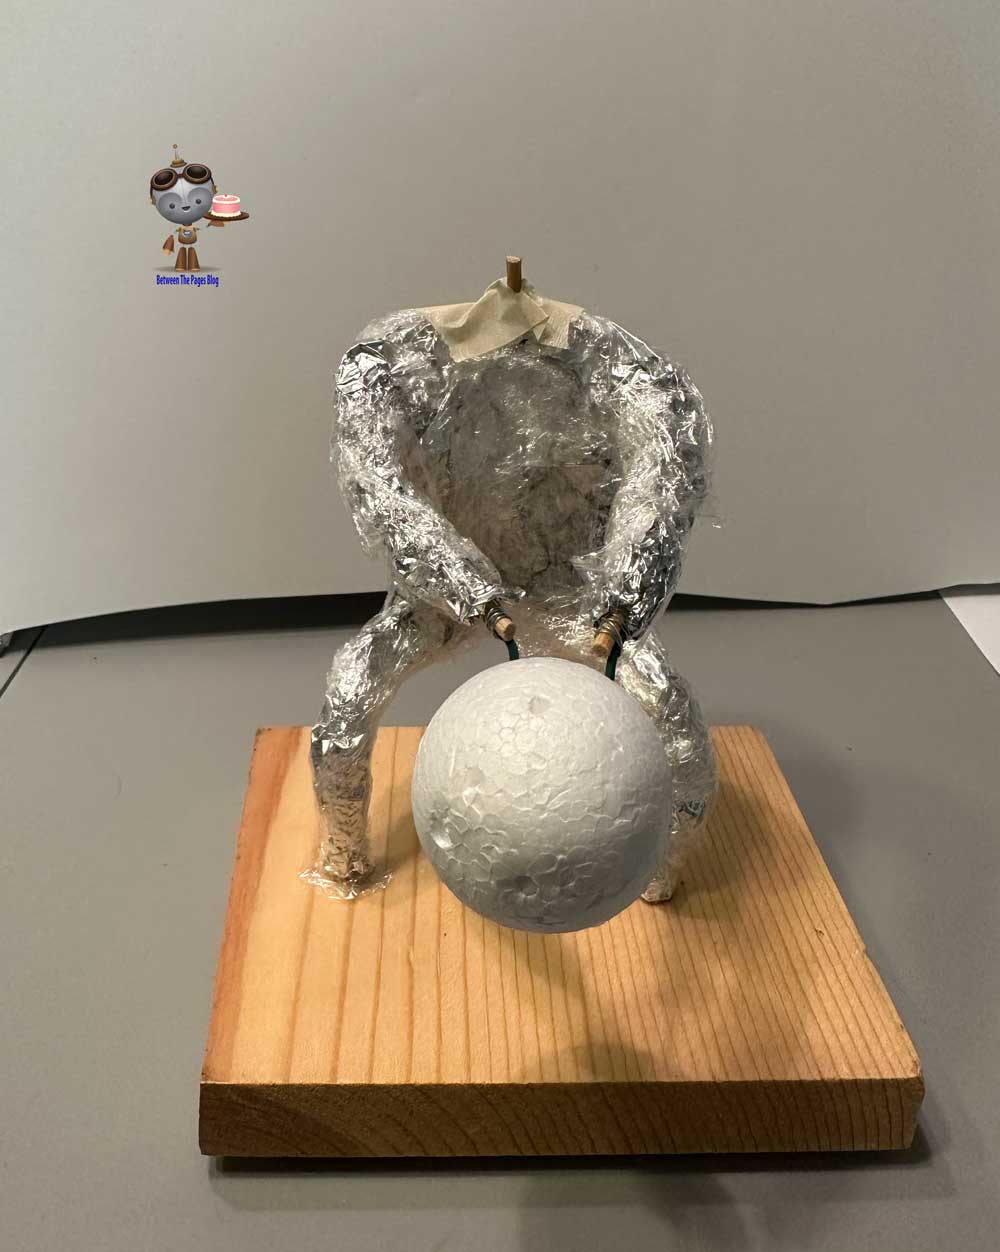
Building the Support Structure Wire Frame
In oder to get Vegeta to hold an energy ball in mid air, I had to use a wire frame support structure. First I curved a piece of 16 gauge wire into the rough form of the legs and torso. Next I wrapped another piece of wire around the top of the torso for the arms. In addition I added another piece of wire for the neck and head at the middle of the top of the torso. Lastly I attached a piece of bamboo stick using 30 gauge wire. The head would later be attached to the bamboo stick.
Adding bamboo pieces for straight limbs
Next I followed the advice of Fritz Hoppe . I made a more sturdy and an accurate wire frame by making straight limbs and well defined joints. In order to do this I used 30 gauge wire to attach small pieces of bamboo skewers for the top and bottom of the arms and legs. In addition I made sure to leave separation between the two pieces for the elbow and the knee. You can see the 30 gauge wire and the bamboo sticks at the end of the arms in the above picture. I made the wire for the arms long enough to attach to a styrene ball. The styrene ball made a lightweight base for the energy ball.
Here’s his video below.
Cover with squared of foil
After that in order to add some bulk, I covered the whole structure in small squares of aluminum foil to make a rough shape for the torso and to bulk up the arms and legs. If I do this again I will not add quite so much, because when I added the fondant the figure was wider that I initially expected.
Add plastic wrap pieces
Next I added a layer of plastic wrap pieces to make sure the foil pieces would not come apart. This picture shows masking tape at the top near the neck. Later I had to remove it as I was adding the fondant. This was because the tape was not sticking that well to the plastic wrap. Also I added xylose powder to all of the fondant to make it into gumpaste so that it would dry more quickly.
Add layer of fondant
Since I had a thin layer of fondant on top of this frame I was able to reposition the figure onto its base several hours after I had made the figure.
Making the Base
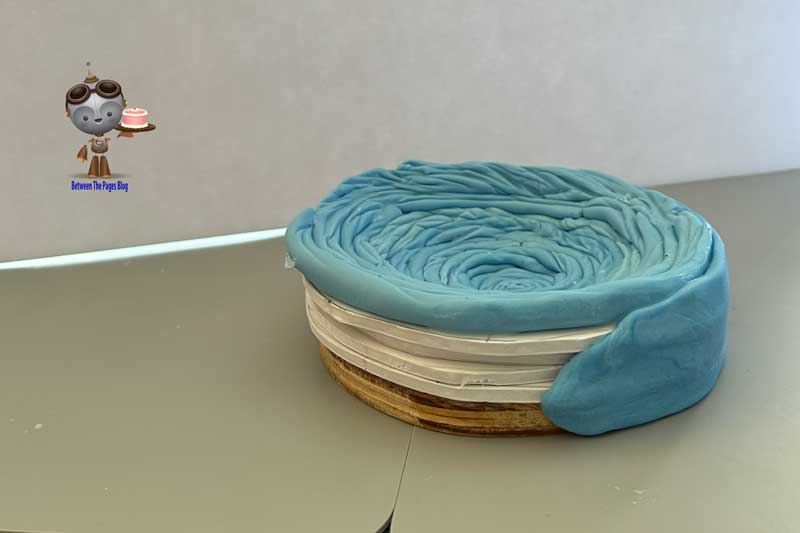
In addition here is an in-progress picture of the energy swirl at Vegeta’s feet. I started with a 6 inch wooden circle. Next I added concentric circles of foam board cut out in the middle to create circles sloping downward. The circles stepped down inwardly much like stadium seating. Also I made sure to leave room for his shoes on one level up from the bottom. This placement made the very middle slightly below him. Next I covered the foam board with light blue fondant. I made sure to add holes for his legs and to leave these holes accessible.
Positioning the figure on the base
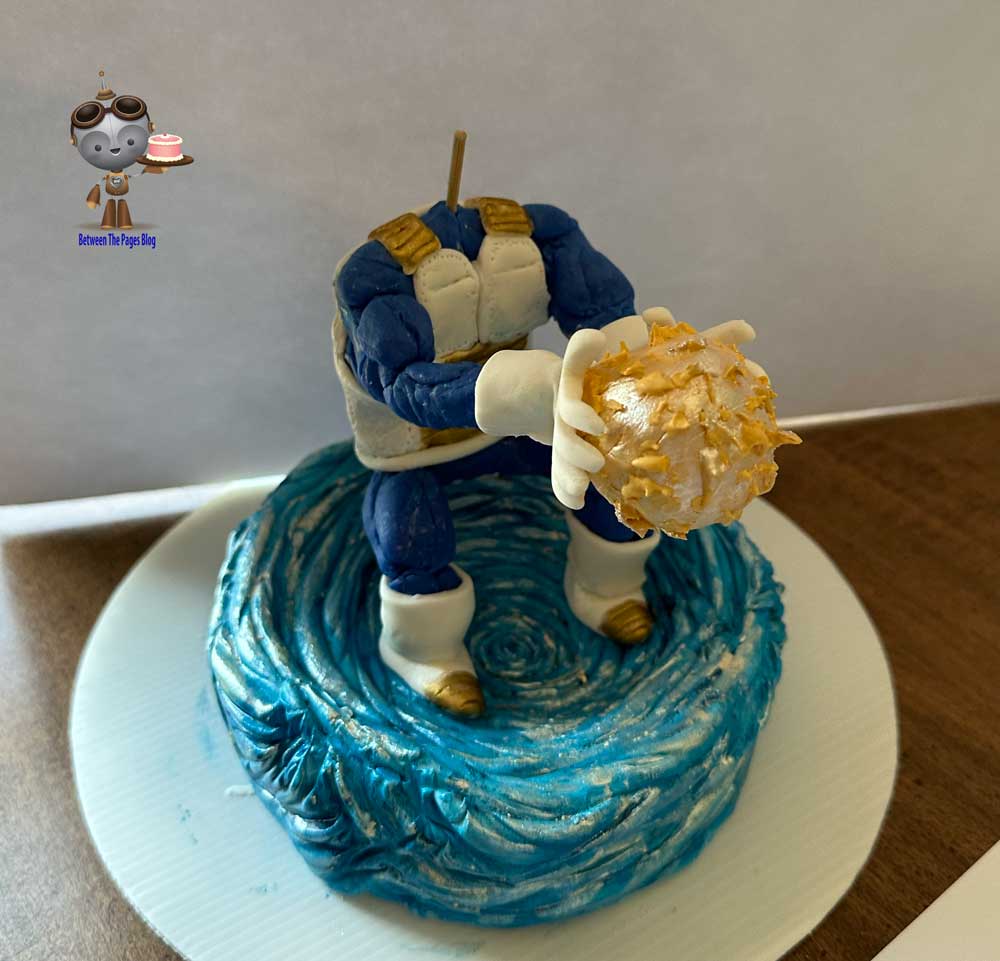
Once the figure body was complete and the base was complete, I put them together. I used the weights for the head and hair and boots from the Kaomi video for Goku above so that the figures would be proportionally the same size.
Here’s more pictures of the cake at the party.
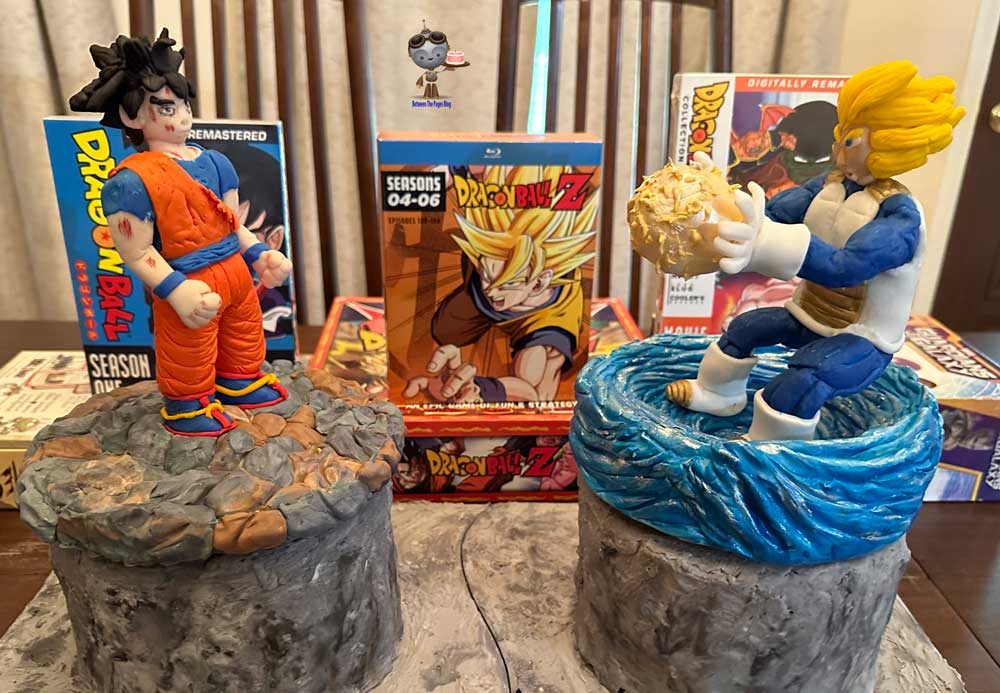
I like the way the cake is surrounded by DragonBall Z games.
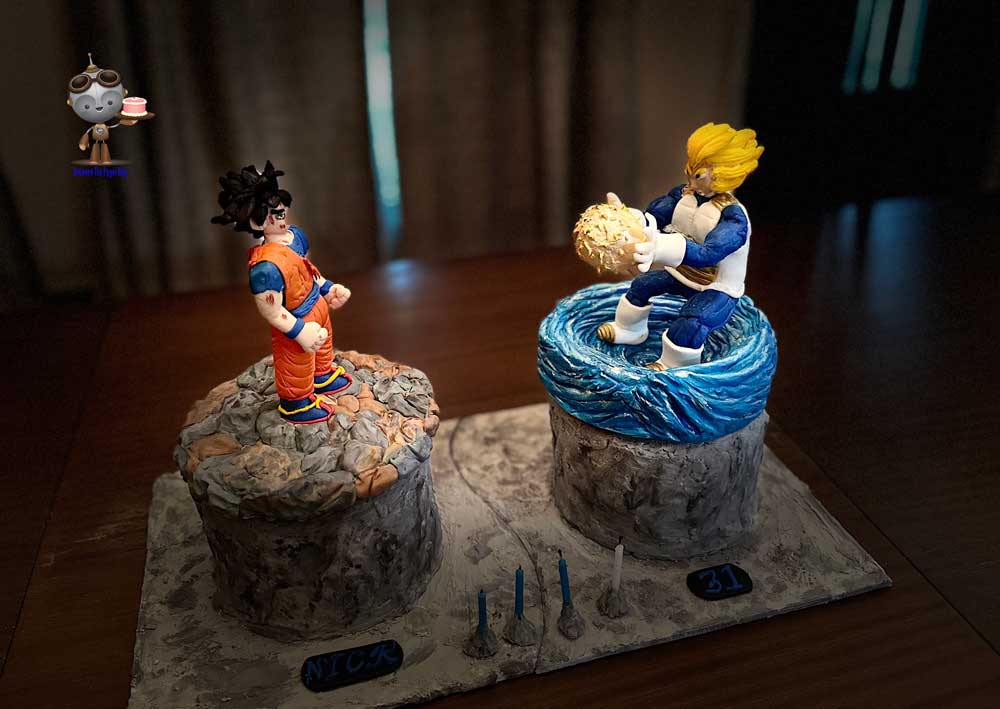
Here’s a picture of the cake with candles and each Dragon Ball Z fondant cake topper figure on its separate cake.
Finally you may also enjoy these Pop Culture Tutorials and these Between The Pages Creations.

